
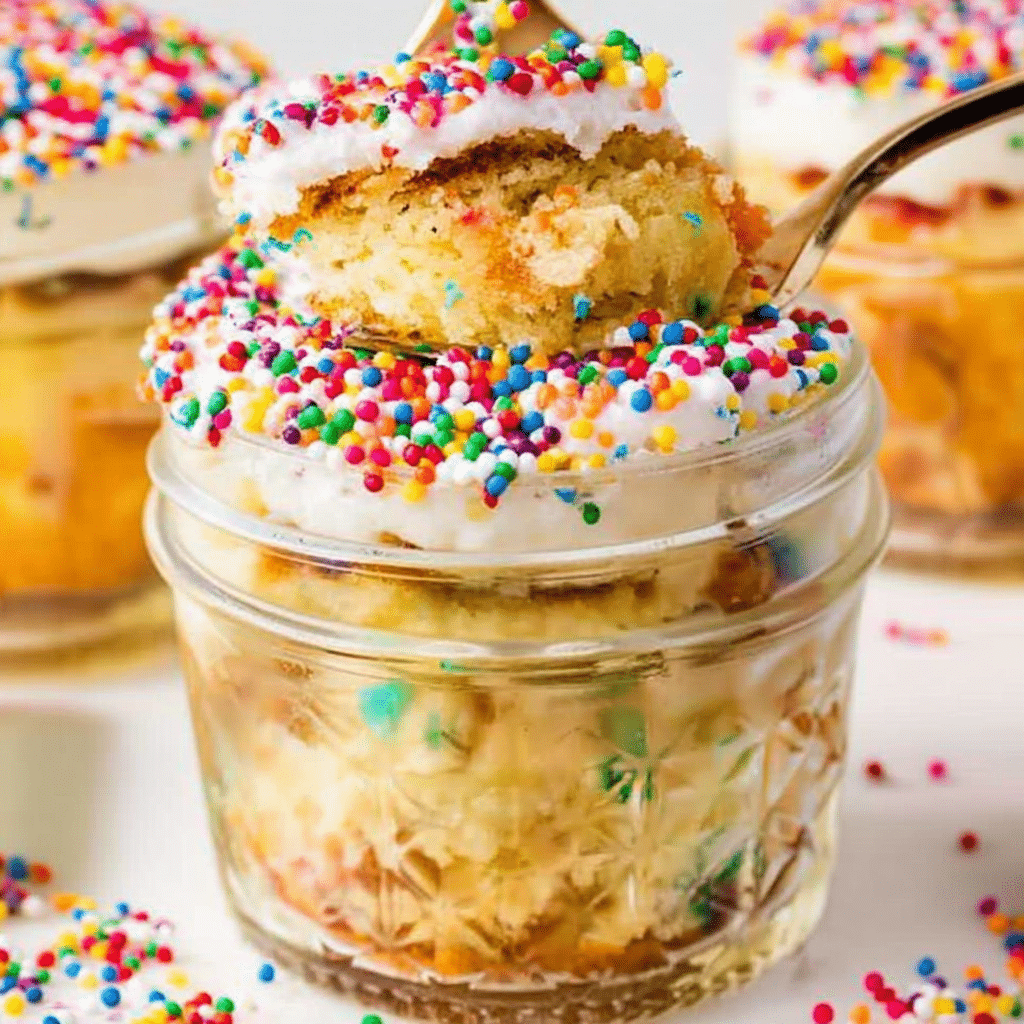
Mini Dot Cake is a delightful dessert that transforms a classic vanilla cake into charming individual treats. Each mini cake features soft layers of sponge, smooth vanilla buttercream, and a colorful sprinkle topping that instantly brightens any dessert table. Whether you’re planning a birthday party, baby shower, holiday gathering, or afternoon tea, these adorable cakes are sure to impress. Despite their elegant appearance, they are surprisingly simple to prepare with basic baking ingredients. Follow this guide to create moist, flavorful Mini Dot Cakes that look beautiful and taste even better.
Why You’ll Love This Mini Dot Cake
Mini Dot Cake offers everything you want in a homemade dessert. The sponge stays incredibly soft, the buttercream delivers a rich and creamy finish, and the sprinkles create a cheerful look without requiring complicated decorating skills.
This recipe works well for beginners because every step is straightforward and easy to follow. Since each cake is individually portioned, serving guests becomes effortless while adding a professional touch to your dessert presentation.
At Richy Bites, Alessia believes that homemade recipes should bring people together through simple ingredients and enjoyable moments. This Mini Dot Cake perfectly reflects that idea by combining classic flavors with an easy decorating method that anyone can master.
Ingredients You’ll Need
For the Cake
| Ingredient | Quantity |
|---|---|
| Whole milk | 1¼ cups (310 ml) |
| Unsalted butter | 113 g |
| Salt | 1 teaspoon |
| Cake flour | 2 cups (300 g) |
| Baking powder | 2 teaspoons |
| Caster sugar | 1¾ cups (385 g) |
| Eggs | 4, room temperature |
| Vanilla bean paste | 1 tablespoon |
For the Frosting
| Ingredient | Quantity |
|---|---|
| Softened butter | 400 g |
| Icing sugar, sifted | 900 g |
| Milk | 1 to 2 tablespoons |
| Vanilla bean paste | 1 tablespoon |
For Assembly
| Ingredient | Quantity |
|---|---|
| Simple syrup | ½ cup |
| Rainbow sprinkles | 180 g |
| Ice cream cups | 10 |
How to Make Mini Dot Cake
Start by preparing a lined baking pan and preheating the oven. Warm the butter and milk together until the butter melts completely, then stir in the salt. Allow the mixture to cool slightly while preparing the remaining ingredients.
Whisk the eggs, sugar, and vanilla until the mixture becomes thick and pale. Blend in the warm milk mixture before gently folding in the dry ingredients. The batter will seem thinner than many cake batters, but this helps produce an exceptionally tender sponge.
Step 1
Heat the oven to 320°F using the fan setting or 350°F for a conventional oven.
Line a rectangular baking pan with parchment paper, making sure both the bottom and sides are fully covered.
Warm the butter and milk in a saucepan until the butter melts. Add the salt and remove from the heat before the mixture begins to boil.
Step 2
Beat the eggs, sugar, and vanilla bean paste for about five minutes until the mixture looks thick, fluffy, and pale.
Gradually pour in the warm milk mixture while mixing. Add the flour and baking powder in two portions, mixing only until everything is combined.
Transfer the batter to the prepared pan and bake for 30 to 35 minutes. Once baked, cover the pan while it cools to help lock in moisture.
Step 3
Prepare the buttercream by beating the softened butter until light in color.
Slowly mix in the icing sugar, adding it in several batches. Pour in the milk and vanilla bean paste, then continue beating until the frosting becomes smooth, creamy, and fluffy.
Fill two piping bags with the finished buttercream.
Step 4
Use a round cutter measuring approximately 7 cm to cut twenty cake circles from the cooled sponge.
Arrange the cuts closely together so you can use as much cake as possible.
Step 5
Place one cake round inside each ice cream cup.
Lightly brush the surface with simple syrup if you prefer extra moisture.
Pipe buttercream around the outside edge and in the center before placing another cake round on top.
Brush the second layer with syrup, then pipe buttercream over the top and smooth it with a small offset spatula.
Step 6
Pour the sprinkles into a shallow bowl.
Carefully press each frosted cake into the sprinkles until the entire surface is evenly coated.
Serve immediately or refrigerate until ready to enjoy.
Helpful Tips
Use room-temperature eggs because they whip more easily and create a lighter sponge.
Avoid mixing the batter longer than necessary after adding the flour. Gentle mixing keeps the cake tender.
Allow the cake to cool completely before cutting circles to prevent tearing.
Simple syrup helps the sponge remain moist if you prepare the cakes ahead of time.
An offset spatula creates a smoother buttercream finish and makes decorating easier.
Recipe Details
| Detail | Information |
|---|---|
| Flavor | Vanilla |
| Texture | Soft, fluffy, creamy |
| Prep Time | 25 minutes |
| Cook Time | 35 minutes |
| Total Time | 1 hour |
| Servings | 10 |
| Best For | Parties, birthdays, afternoon tea, celebrations |
Variations
Replace the vanilla sponge with chocolate cake for a richer dessert.
Spread a thin layer of raspberry or strawberry jam between the cake layers for extra flavor.
Use seasonal sprinkles to match holidays or themed parties.
Add almond, lemon, or coconut extract to the buttercream for a different taste.
Nutritional Information Per Serving
| Nutrient | Approximate Amount |
|---|---|
| Calories | 690 |
| Fat | 35 g |
| Protein | 6 g |
| Carbohydrates | 90 g |
| Sugar | 70 g |
Nutrition values are approximate and may vary depending on the products used.
My Experience Making This Recipe
One afternoon, I planned to finish these Mini Dot Cakes before heading to an afternoon tea event. Everything was running smoothly until I received a message asking where I was. After checking my calendar, I realized I had accidentally saved the invitation while traveling in another time zone. The event started two hours earlier than I expected.
Although I arrived much later than planned, the experience taught me something valuable about this recipe. The cakes remained wonderfully moist overnight, especially because I brushed each layer with simple syrup. That unexpected delay confirmed that these Mini Dot Cakes are an excellent make-ahead dessert for parties and special occasions.
Frequently Asked Questions
What is a Mini Dot Cake?
A Mini Dot Cake is a personal-sized layered vanilla cake assembled inside a small cup and decorated with buttercream and colorful sprinkles.
How do you make a Mini Dot Cake?
Bake a vanilla sheet cake, cut it into circles, layer the cake with buttercream inside cups, frost the top, and finish with sprinkles.
What frosting works best for decorating a Mini Dot Cake?
Classic vanilla buttercream is the best choice because it pipes easily, holds its shape well, and helps the sprinkles stick evenly.
Can you make Mini Dot Cakes ahead of time?
Yes. You can prepare them up to three days in advance when stored in an airtight container, or freeze them for up to two months.
Storage Instructions
Keep the finished Mini Dot Cakes in an airtight container at room temperature for up to three days.
For longer storage, wrap the cakes well and freeze them for up to two months. Defrost them overnight in the refrigerator before serving for the best texture.
Print
Mini Dot Cake | Easy Homemade Party Dessert Everyone Will Love
- Total Time: 1 hour
- Yield: 10 mini cakes 1x
- Diet: Vegetarian
Description
Mini Dot Cake features soft vanilla sponge, creamy vanilla buttercream, and colorful sprinkles layered inside individual ice cream cups. These cheerful mini cakes work beautifully for birthdays, afternoon tea, baby showers, and family celebrations.
Ingredients
For the cake:
1 1/4 cups whole milk, 310 ml
1 stick unsalted butter, 113 g
1 teaspoon salt
2 cups cake flour, 300 g
2 teaspoons baking powder
1 3/4 cups caster or superfine sugar, 385 g
4 large eggs, room temperature
1 tablespoon vanilla bean paste
For the frosting:
400 g unsalted butter, softened
900 g icing sugar, sifted
1 to 2 tablespoons whole milk
1 tablespoon vanilla bean paste
For assembly:
1/2 cup simple syrup, optional
180 g colorful sprinkles
10 ice cream cups
Instructions
1. Preheat the oven to 320°F for a fan-forced oven or 350°F for a conventional oven. Line a 15 x 12 x 2-inch rectangular baking pan with parchment paper.
2. Heat the milk and butter in a saucepan until the butter melts. Stir in the salt. Do not boil the mixture. Set it aside while you sift the cake flour and baking powder into a bowl.
3. Beat the sugar, eggs, and vanilla bean paste on medium-high speed for 5 minutes until thick, pale, and fluffy.
4. Add the warm milk mixture and whisk for about 15 seconds. Add the flour mixture in two batches and mix on low speed just until smooth. Do not overmix.
5. Pour the thin batter into the prepared pan. Bake for 30 to 35 minutes, or until the center springs back when lightly pressed.
6. Cover the pan with a baking dish or clean tray while the cake cools. This traps steam and helps the sponge stay moist.
7. Make the buttercream while the cake cools. Beat the softened butter on medium-high speed for 2 minutes until pale and creamy.
8. Add the sifted icing sugar in four batches while mixing on low speed. Add the milk and vanilla bean paste, then beat on medium-high speed for 3 minutes until fluffy. Transfer the frosting to piping bags.
9. Cut 20 cake rounds with a 2.8-inch round cutter. Keep the cuts close together to reduce waste.
10. Place one cake round inside each ice cream cup. Brush or drizzle it with simple syrup, if using. Pipe buttercream around the edge and across the center.
11. Add a second cake round. Brush it with simple syrup, then pipe buttercream around the edge and across the top. Smooth the frosting with an angled spatula.
12. Pour the sprinkles into a wide bowl. Carefully dip the frosted top of each Mini Dot Cake into the sprinkles until evenly coated.
13. Serve immediately, or store the finished cakes in an airtight container until needed.
Notes
Use room-temperature eggs so they whip more easily and create a lighter cake.
Do not overmix the batter after adding the flour.
The batter will look thin. This is normal.
Simple syrup helps the cake stay moist, especially when prepared ahead.
Let the cake cool completely before cutting the rounds.
Store the cakes in an airtight container at room temperature for up to 3 days.
Freeze the assembled cakes in freezer-safe containers for up to 2 months.
Thaw frozen cakes overnight in the refrigerator before serving.
Nutrition values are estimates and may vary by ingredient brand and serving size.
- Prep Time: 25 minutes
- Cook Time: 35 minutes
- Category: Dessert
- Method: Baking
- Cuisine: American
Nutrition
- Serving Size: 1 mini cake
- Calories: 690
- Sugar: 70 g
- Sodium: 310 mg
- Fat: 35 g
- Saturated Fat: 21 g
- Unsaturated Fat: 12 g
- Trans Fat: 1 g
- Carbohydrates: 90 g
- Fiber: 1 g
- Protein: 6 g
- Cholesterol: 155 mg
Conclusion
Mini Dot Cake is a fun and elegant dessert that combines fluffy vanilla cake, creamy buttercream, and colorful sprinkles into perfectly portioned treats. They are simple enough for beginner bakers while offering a polished appearance that suits birthdays, celebrations, and afternoon gatherings. Since they stay fresh for several days and freeze well, you can prepare them ahead of time without sacrificing flavor or texture. Bake a batch for your next special occasion and enjoy sharing these cheerful little cakes with family and friends.